How EAZE WAVE Works
The EAZE WAVE System implements a patented stimulation protocol to provide relaxation prior to and during sleep.
The frequencies used are all within the audio spectrum, but the non-audible EAZE WAVE technology creates a noise-free environment where these relaxing frequencies are converted into low-intensity magnetic waves.

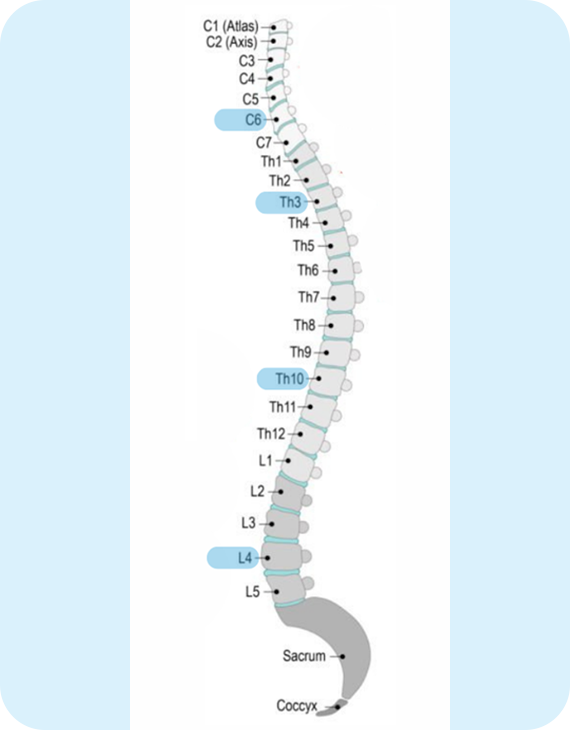
Spinal Model with Vertebrae Location
Stimulating The Body's Energy Points
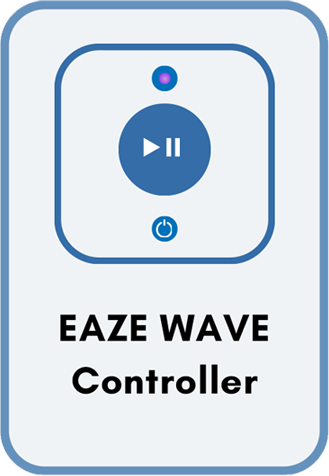
The EAZE WAVE system comprises of a EAZE WAVE Controller that delivers a narrow band radio frequency signal at 28 Kilo Hertz with side bands that incorporate relaxation frequencies into a conductor that is embedded within an EAZE WAVE Pad. This radio frequency signal generates low intensity magnetic waves as it transverses down the conductor that stimulate key energy points along the spine positioned at L4, Th10, Th3, C6 vertebrae locations.
The aim of this stimulation is to balance the body’s energy and improve the flow of energy along the spine to promote relaxation prior to and during sleep.
What Is Included with the System
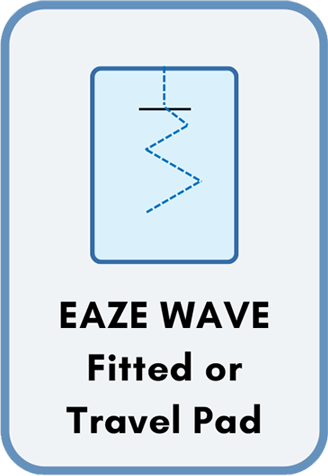
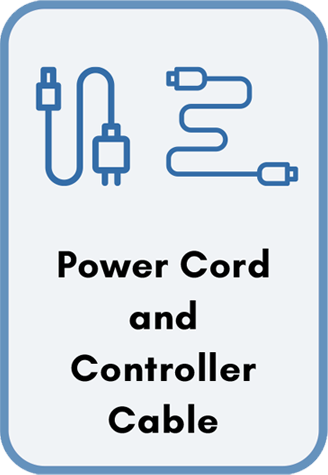
Inside the EAZE WAVE box, you’ll find everything you need to keep your system running smoothly:
EAZE WAVE Pad Set Up
Follow the steps below to correctly set up EAZE WAVE Fitted or Travel Pad on your mattress
1
Unfold
EAZE WAVE Fitted or Travel Pad
2
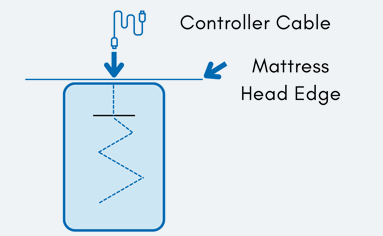
Connect the controller cable to the Fitted or Travel Pad connector
3
Position the Fitted or Travel Pad flat directly onto the mattress and underneath the mattress protector. Ensure the pad’s connector end is on the mattress head end, not the foot end.
4
The Fitted Pad will self-align. For the Travel Pad, align the Pad along the side and top edge of the mattress so that the connector end overhangs the mattress head edge.
5
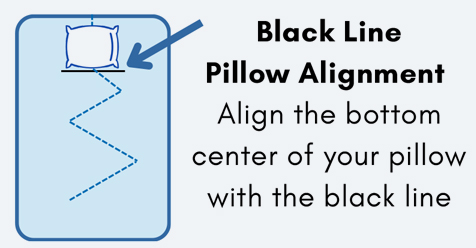
When positioning the Fitted or Travel Pad on the mattress, ensure that the black line is visible, which is used for positioning the pillow on the bed.
6
Place all bed items (mattress protector, fitted sheet, etc.) over the Fitted or Travel Pad ensuring the Pad is flat on your mattress.
EAZE WAVE Fitted Pad Set Up
7
Place your pillow on the mattress, ensuring it sits in between the black line and the top edge of your mattress
8
You are ready to move onto the next step: EAZE WAVE Controller Setup
EAZE WAVE Controller Setup
Follow the steps below to correctly set up and operate the EAZE WAVE Controller
1
Check to make sure the Power Button is Off (Button Out)
2
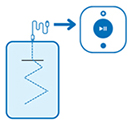
Connect the controller cable to the Controller
3
Connect one end of the Power Cord to the Controller, and the other end to a power outlet

4
Place the Controller near to your bed, on a flat surface, such as a nightstand
5
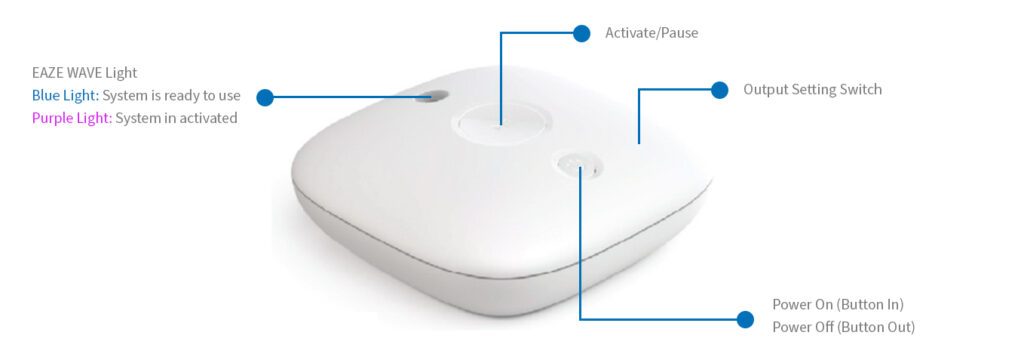
Press Power On Button to turn the System On. You should see a Blue Light appear
6
Press the Activate Button and the light will change to Purple, indicating the system is now activated
EAZE WAVE Controller Output Settings Guide
Setting 1
We recommend starting with Setting 1 during the first 60-nights to allow the body to get used to the system.
Setting 2
After 60 consecutive nights, change to Setting 2 if relaxation is not being achieved at Setting 1.
Setting 3
After an additional 90 consecutive nights, change to Setting 3 if relaxation is not being achieved at Setting 2.
Setting 4
If relaxation is not being achieved at Setting 3, change to Setting 4.
Move at Your Own Pace
You may stay at a setting for as long as it helps you relax, even if it’s longer than the recommended setting period. You can also move to a higher setting at a faster pace than recommended.
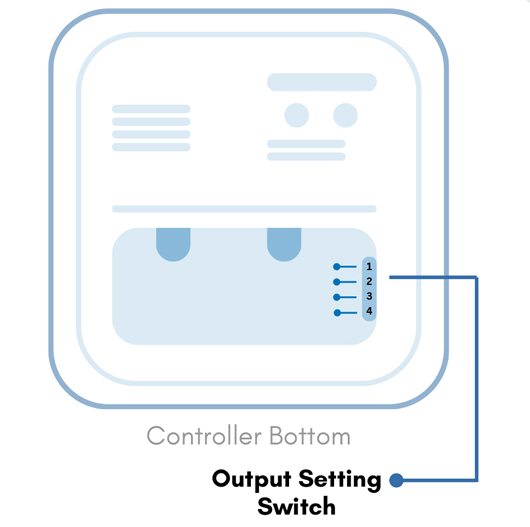
Adjusting Output Setting
The output setting switch is located on the bottom of the Controller.
SAFETY FIRST: To change the setting, first disconnect the power cord from the power supply and from the Controller to ensure that there is no power flowing through.
Then, flip the Controller upside down to access the switch panel.
Using the tip of a pen or similar object move the output setting switch (micro switch) to the output setting you desire.
EAZE WAVE Operating Instructions
After setting up the EAZE WAVE Fitted or Travel Pad and the EAZE WAVE Controller (pages 8 to 11) you are ready to use the EAZE WAVE system.
Ready to Sleep
When ready to sleep (lights off, TV off), turn the Controller on by pressing the power button. When the controller is on the power button will be IN (page 9) and a Blue light will appear. Press the Activate button, and a Purple light will appear (page 9). Once the Purple light is on you may start experiencing the EAZE WAVE relaxation technology.
On Awakening
Turn the Controller off by pressing the power button. When the controller is off the power button will be OUT (page 9) and the light will also turn off.
Important
If you forget to turn off the Controller on awakening and the Purple light is on then before using EAZE WAVE again always power down the Controller and ensure that the light turns off before powering back up again.
When to Pause EAZE WAVE
If you need to leave your bed for more than 10 minutes while using EAZE WAVE, please pause it. Just press the pause button (page 9) when you get up and press the activate button when you return to bed. Ensure the system light is Purple when lying back down, indicating EAZE WAVE is ready to use.
Specifications and Disclaimers
Controller Specifications:
- Vin:12V regulated power supply
- Bandwidth: 37Hz to 28KHz
- V out: 4.039V
- Carrier Freq: 28.4 kHz
- I out: 25.04µA
Recommendation:
To help your body adjust to the system, make sure to stay hydrated and limit the intake of alcohol and caffeine before going to sleep.
Disclosure and Disclaimer:
- Proper and standard use as provided in the OPERATING GUIDE is important.
- EAZE WAVE has not been evaluated by the Food and Drug Administration. This product is not intended to diagnose, treat, cure or prevent any disease.
- EAZE WAVE has been rigorously tested for safety. Specifically, compliant to IEC 60601-1 Medical Electrical Equipment (Part 1) General requirements for basic safety and essential performance and compliant to IEC 62233:2005- Measurement of electromagnetic fields of household appliances and similar apparatus with regard to human exposure.
- EAZE WAVE complies with Part 15 of the FCC Rules. Operation is subject to the following two conditions:
- (1) This device may not cause harmful interference
- (2) This device must accept any interference received, including interference that may cause undesired operation.
TROUBLESHOOTING
Identifying Possible Issues and Troubleshooting:
- On awakening, the Controller light should be Purple (unless the system was paused). A Blue light on awakening indicates a power drop or surge during the night. Restart the system.
- A flashing Purple light indicates an issue reading the frequencies.
- The issues above are rare and should fix themselves by restarting the system.
- If restarting the system doesn’t fix these issues, please contact us at [email protected]
How to restart/reset the System?
Turn the system Off by pressing the Power Off Button and turn the system back On by pressing the Power On Button.
CARE INSTRUCTIONS
Due to the Electronic Nature of the EAZE WAVE Pad
DO NOT WASH
DO NOT DRY-CLEAN
SPOT CLEAN ONLY
by blotting the stain. Apply a stain remover to a clean white cloth and blot the stained area. Use another clean white cloth dampened with water and blot again to rinse. Let the cover dry completely. Repeat the process if needed.
